
source: https://dzone.com/articles/securing-rest-services-with-oauth2-in-springboot-1
In this post, I will explain how we can provide security for REST services in Spring Boot. The example application is the same as the previous WEB security entry (Spanish version; English version). The source code can be found on GitHub.
Explaining the OAuth2 Technology
As I said, we will use the OAuth2 protocol, so the first thing will be to explain how this protocol works.
OAuth2 has some variants, but I am going to explain what I will use in the program, and for this, I will give you an example so that you understand what we intend to do.
I will put a daily scene: payment with a credit card in a store. In this case, there are three partners: the store, the bank, and us. Something similar happens in the OAuth2 protocol. These are the steps:
- The client, or the buyer, asks the bank for a credit card. Then, the bank will collect our information, verify who we are, and provide us a credit card, depending on the money we have in our account or if it tells us not to waste time. In the OAuth2 protocol that grants the cards, it is called the Authentication Server.
- If the bank has given us the card, we can go to the store, i.e. the web server, and we present the credit card. The store does not owe us anything, but they can ask the bank, through the card reader, if they can trust us and to what extent (the credit balance). The store is the Resource Server.
- The store, depending on the money that the bank says we have, will allow us to make purchases. In the OAuth2 analogy, the web server will allow us to access pages, depending on our financial status.
In case you have not noticed that authentication servers are usually used, when you go to a webpage and are asked to register, but as an option, it lets you do it through Facebook or Google, you are using this technology. Google or Facebook becomes the ‘bank’ that issues the ‘card.’ The webpage that asks you to register will use it to verify that you have ‘credit’ and let you enter.

Here, you can see the website of the newspaper “El Pais” where you can create an account. If we use Google or Facebook, the newspaper (the store) will rely on what those authentication providers tell them. In this case, the only thing the website needs is for you to have a credit card — regardless of the balance
Creating an Authorization Server
Now, let’s see how we can create a bank, store, and everything else that you need.

First, in our project, we need to have the appropriate dependencies. We will need the starters: Cloud OAuth2, Security, and Web.
Well, let’s start by defining the bank; this is what we do in the class: AuthorizationServerConfiguration:
public class AuthorizacionServerConfiguration extends AuthorizationServerConfigurerAdapter {
("authenticationManagerBean")
private AuthenticationManager authenticationManager;
private TokenStore tokenStore;
public void configure (ClientDetailsServiceConfigurer clients) throws Exception {
clients.inMemory ()
.withClient ("client")
.authorizedGrantTypes ("password", "authorization_code", "refresh_token", "implicit")
.authorities ("ROLE_CLIENT", "ROLE_TRUSTED_CLIENT", "USER")
.scopes ("read", "write")
.autoApprove (true)
.secret (passwordEncoder (). encode ("password"));
}
public PasswordEncoder passwordEncoder () {
return new BCryptPasswordEncoder ();
}
public void configure (AuthorizationServerEndpointsConfigurer endpoints) throws Exception {
endpoints
.authenticationManager (authenticationManager)
.tokenStore (tokenStore);
}
public TokenStore tokenStore () {
return new InMemoryTokenStore ();
}
}
We start the class by entering it as a configuration with the @ Configuration label and then use the @EnableAuthorizationServer tag to tell Spring to activate the authorization server. To define the server properties, we specify that our class extends the AuthorizationServerConfigurerAdapter, which implements the AuthorizationServerConfigurerAdapterinterface, so Spring will use this class to parameterize the server.
We define an AuthenticationManager type bean that Spring provides automatically, and we will collect with the @Autowiredtag. We also define a TokenStoreobject, but to be able to inject it, we must define it, which we do in the publicfunction TokenStore tokenStore().
The AuthenticationManager, as I said, is provided by Spring, but we will have to configure it ourselves. Later, I will explain how it is done. The TokenStoreor IdentifierStoreis where the identifiers that our authentication server is supplying will be stored, so when the resource server (the store) asks for the credit on a credit card, it can respond to it. In this case, we use the InMemoryTokenStoreclass that will store the identifiers in memory. In a real application, we could use a JdbcTokenStoreto save them in a database so that if the application goes down, the clients do not have to renew their credit cards.
In the function configure (ClientDetailsServiceConfigurer clients),we specify the credentials of the bank, I say of the administrator of authentications, and the services offered. Yes, in plural, because to access the bank, we must have a username and password for each of the services offered. This is a very important concept: the user and password is from the bank, not the customer. For each service offered by the bank, there will be a single authentication, although it may be the same for different services.
I will detail the lines:
-
clients.inMemory ()specifies that we are going to store the services in memory. In a ‘real’ application, we would save it in a database, an LDAP server, etc. -
withClient ("client")is the user with whom we will identify in the bank. In this case, it will be called ‘client.’ Would it have been better to call him ‘user?’ - To
uthorizedGrantTypes ("password", "authorization_code", "refresh_token", "implicit"), we specify services that configure for the defined user, for ‘client.’ In our example, we will only use the passwordservice. -
authorities ("ROLE_CLIENT", "ROLE_TRUSTED_CLIENT", "USER")specifies roles or groups contained by the service offered. We will not use it in our example either, so let’s let it run for the time being. -
scopes ("read", "write")is the scope of the service — nor will we use it in our application. -
autoApprove (true)— if you must automatically approve the client’s requests, we’ll say yes to make the application simpler. -
secret (passwordEncoder (). encode ("password"))is the password of the client. Note that the encodefunction that we have defined a little below is called to specify with what type of encryption the password will be saved. The encode function is annotated with the@Beantag because Spring, when we supply the password in an HTTP request, will look for aPasswordEncoderobject to check the validity of the delivered password.
And finally, we have the function configure (AuthorizationServerEndpointsConfigurer endpoints) where we define which authentication controller and store of identifiers should use the end points. Clarify that the end points are the URLs where we will talk to our ‘bank’ to request the cards.
Now, we have our authentication server created, but we still need the way that he knows who we are and puts us in different groups, according to the credentials introduced. Well, to do this, we will use the same class that we use to protect a webpage. If you have read the previous article (in Spanish), remember that we created a class that inherited from the WebSecurityConfigurerAdapter, where we overwrote the function UserDetailsService userDetailsService ().
public class WebSecurityConfiguration extends WebSecurityConfigurerAdapter {
....
public UserDetailsService userDetailsService () {
UserDetails user = User.builder (). Username ("user"). Password (passwordEncoder (). Encode ("secret")).
roles ("USER"). build ();
UserDetails userAdmin = User.builder (). Username ("admin"). Password (passwordEncoder (). Encode ("secret")).
roles ("ADMIN"). build ();
return new InMemoryUserDetailsManager (user, userAdmin);
}
....
}
Well, users with their roles or groups are defined in the same way. We should have a class that extends WebSecurityConfigurerAdapter and define our users.
Now, we can check if our authorizations server works. Let’s see how using the excellent PostManprogram.
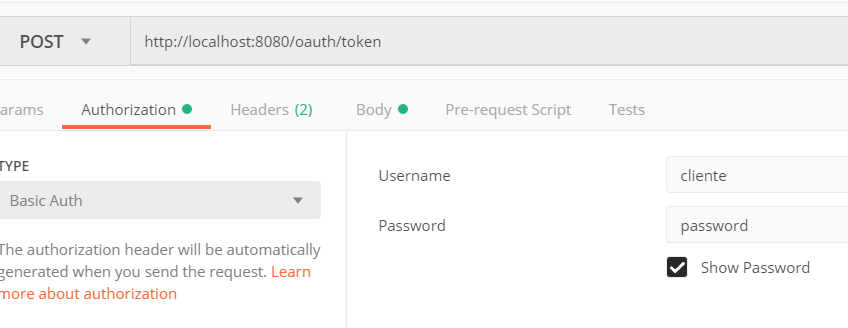
To speak with the ‘bank’ to request our credentials, and as we have not defined otherwise, we must go to the URI “/oauth/token.” This is one of the end points I spoke about earlier. There is more, but in our example, since we are only going to use the service ‘password,’ we will not use more.
We will use an HTTP request type POST, indicating that we want to use basic validation. We will put the user and password, which will be those of the “bank,” in our example, using ‘client’ and ‘password’ respectively.
In the body of the request and in form-url-encoded format, we will introduce the service to request, our username, and our password.
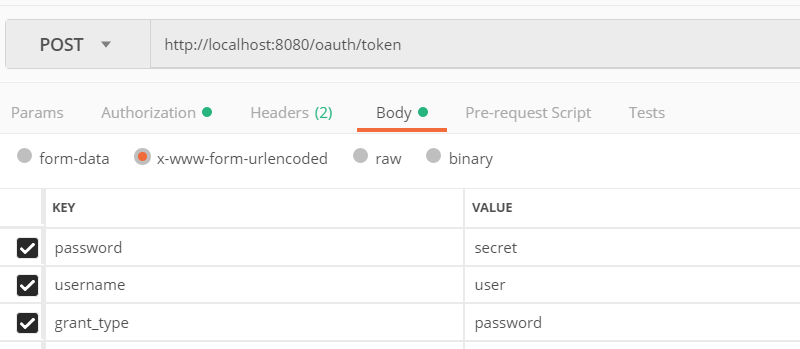
And, we launched the petition, which should get us an exit like this:

That ‘access_token’ ” 8279b6f2-013d-464a-b7da-33fe37ca9afb ” is our credit card and is the one that we must present to our resource server (the store) in order to see pages (resources) that are not public.
Creating a Resource Server (ResourceServer)
Now that we have our credit card, we will create the store that accepts that card.
In our example, we are going to create the server of resources and authentication in the same program with Spring Boot, which will be in charge without having to configure anything. If, as usual in real life, the resource server is in one place and the authentication server in another, we should indicate to the resource server which is our ‘bank’ and how to talk to it. But, we’ll leave that for another entry.
The only class of the resource server is ResourceServerConfiguration:
public class ResourceServerConfiguration extends ResourceServerConfigurerAdapter
{
.....
}
Observe the @EnableResourceServerannotation that will cause Spring to activate the resource server. The tag @RestControlleris because, in this same class, we will have the resources, but they could be perfectly in another class.
Finally, note that the class extends ResourceServerConfigurerAdapter. This is because we are going to overwrite methods of that class to configure our resource server.
As I said before, since the authentication and resources server is in the same program, we only have to configure the security of our resource server. This is done in the function:
public void configure (HttpSecurity http) throws Exception {
http
.authorizeRequests (). antMatchers ("/ oauth / token", "/ oauth / authorize **", "/ publishes"). permitAll ();
// .anyRequest (). authenticated ();
http.requestMatchers (). antMatchers ("/ private") // Deny access to "/ private"
.and (). authorizeRequests ()
.antMatchers ("/ private"). access ("hasRole ('USER')")
.and (). requestMatchers (). antMatchers ("/ admin") // Deny access to "/ admin"
.and (). authorizeRequests ()
.antMatchers ("/ admin"). access ("hasRole ('ADMIN')");
}
In the previous entry, when we defined the security on the web, we explained a function called configure (HttpSecurity http). How is it much like this? Well, it is basically the same, and in fact, it receives an HttpSecurity object that we must configure.
I explain this code line to line:
http.authorizeRequests().antMatchers("/oauth/token", "/oauth/authorize**", "/publica").permitAll()allow all requests to “/ oauth / token”, “/ oauth / authorize ** “,” / publishes “without any validation.”anyRequest().authenticated()This line is commented. If not, all of the resources would be accessible only if the user has been validated.requestMatchers().antMatchers("/privada")Deny access to the url “/ private”authorizeRequests().antMatchers("/privada").access("hasRole('USER')")allow access to “/ private” if the validated user has the role ‘USER’requestMatchers().antMatchers("/admin")Deny access to the url “/ admin”authorizeRequests().antMatchers("/admin").access("hasRole('ADMIN')")allow access to “/ admin” if the validated user has the role ‘ADMIN’
Once we have our resource server created, we must only create services, which is done with these lines:
("/ publishes")
public String publico () {
return "Public Page";
}
("/ private")
public String private () {
return "Private Page";
}
("/ admin")
public String admin () {
return "Administrator Page";
}
As you can see, there are three basic functions that return their corresponding Strings.
Let’s see now how validation works.
First, we check that we can access “/publica” without any validation:
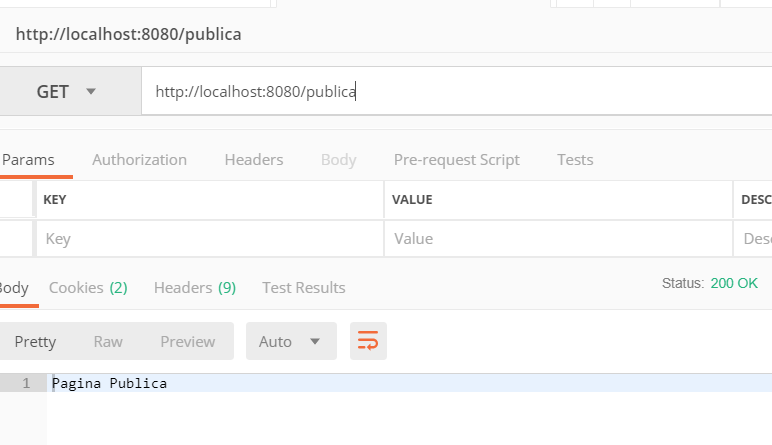
Right. This works!!
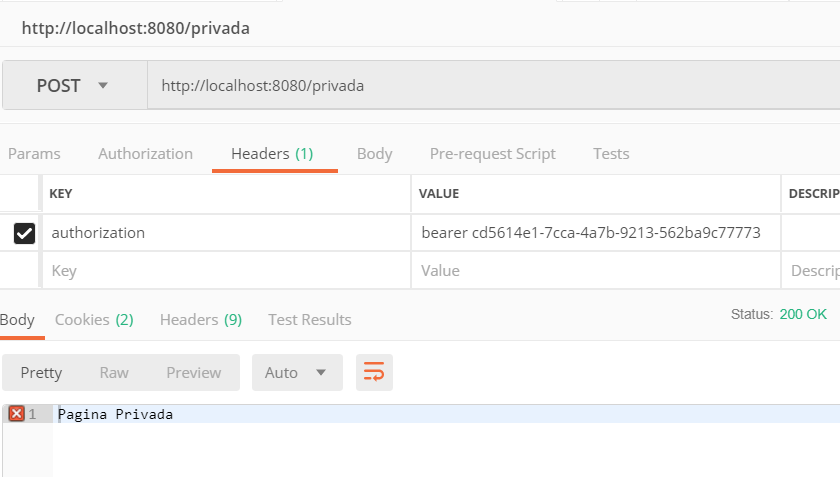
If I try to access the page “/private,” I receive an error “401 unauthorized,” which indicates that we do not have permission to see that page, so we will use the token issued by our authorizations server for the user ‘user‘ to see what happens.
If we can see our private page, then let’s try the administrator’s page:
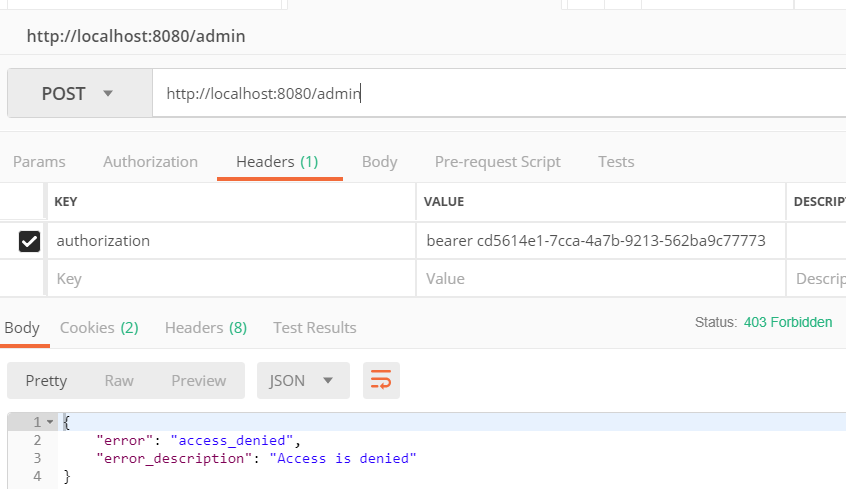
Right, we cannot see it. So, we’re going to request a new token from the credential administrator, but identify ourselves with the user ‘admin.’
The token returned is: ” ab205ca7-bb54-4d84-a24d-cad4b7aeab57.” We use it to see what happens.
Well, that’s it! We can go shopping safely! Now, we just need to set up the store and have the products.
And, that’s it. See you in the next article!
